Making vegan udon noodles from scratch is one of those kitchen rituals that sneaks up on you. It’s not just about feeding yourself; it’s about reconnecting with the simple act of kneading dough, feeling it spring back under your fingertips, and rolling it out until it’s just the right thickness. There’s a quiet joy in turning a handful of ingredients into something that’s both comforting and satisfying, especially when you know it’s all made by hand.
This process turns a quick weeknight dinner into a meditative practice. The rhythmic pressing, folding, and cutting of the dough becomes almost like a form of moving meditation, grounding and calming. It’s a reminder that sometimes, the best meals come from patience and a little tactile love, transforming everyday ingredients into a nourishing, satisfying bowl of noodles.
Focusing on the surprisingly simple yet deeply satisfying process of making vegan udon noodles from scratch, highlighting the tactile joy of kneading dough and the meditative rhythm of rolling and cutting, turning a quick weeknight meal into an almost therapeutic ritual.
The story behind this recipe
- A few years ago, I was craving something warm and filling after a long day, but wanted to avoid the usual takeout. I remembered a small noodle shop I visited in Japan, where the chef’s hands moved like a dance—kneading, rolling, slicing with purpose. That memory stuck with me, especially the aroma of toasted sesame and soy wafting through the air.
- One quiet afternoon, I decided to try making udon from scratch, just to see if I could capture that feeling. Turns out, it’s not just about the noodles; it’s the slow, tactile process that makes it special. Every stretch of dough, every fold, feels like a small act of mindfulness. It became a ritual I return to whenever I need a moment of calm in the chaos.
- story_type
Ingredient breakdown: key components
- Udon flour: I love the slightly nutty aroma when mixing it; if you can’t find it, all-purpose works but won’t be quite the same chewiness.
- Sesame oil: Adds a toasty, nutty depth that makes the dough sing; skip if you prefer a cleaner, lighter flavor.
- Kombu (dried kelp): I use a strip to infuse umami into the broth—its briny, ocean scent is a game changer; skip if you’re avoiding seaweed.
- Soy sauce: I prefer a naturally brewed variety for deeper flavor; opt for low-sodium if you’re watching salt but don’t want to lose richness.
- Green onions: Their sharp bite and fresh zing brighten the dish; slice thin and sprinkle just before serving to keep that crisp bite.
- Tofu (optional): Soft, silken, absorbs flavors well; if you want more protein, firm tofu cubed and sautéed adds a nice chew.
- Nori strips: Bright, smoky crunch that contrasts with the chewy noodles; toast lightly before adding for extra aroma.
Spotlight on key ingredients
Udon flour:
- I love the slightly nutty aroma when mixing it; if you can’t find it, all-purpose works but won’t be quite the same chewiness.
- Sesame oil: Adds a toasty, nutty depth that makes the dough sing; skip if you prefer a cleaner, lighter flavor.
- Kombu (dried kelp): I use a strip to infuse umami into the broth—its briny, ocean scent is a game changer; skip if you’re avoiding seaweed.
Green onions and Nori:
- Green onions: Their sharp bite and fresh zing brighten the dish; slice thin and sprinkle just before serving to keep that crisp bite.
- Tofu (optional): Soft, silken, absorbs flavors well; if you want more protein, firm tofu cubed and sautéed adds a nice chew.
- Nori strips: Bright, smoky crunch that contrasts with the chewy noodles; toast lightly before adding for extra aroma.
Notes for ingredient swaps
- Gluten-Free: Swap all-purpose flour for gluten-free flour blend. Expect a slightly denser, more delicate noodle texture.
- Oil-Free: Omit sesame oil and use a splash of water or rice vinegar for moisture—less toasty aroma, more subtle flavor.
- Soy-Free: Replace soy sauce with coconut aminos. It’s milder, with a hint of sweetness, but less punch of umami.
- Vegan Butter: Use a neutral plant-based oil like canola or sunflower oil if you prefer a richer, softer dough.
- Vegetable Broth: Use homemade veggie broth instead of water to add depth and aromatic complexity, especially if simmered with herbs.
- Nori Alternatives: Use toasted seaweed flakes or kelp granules for crunch and smoky flavor, if you don’t have nori.
- Fresh Ginger: Use ginger powder sparingly if fresh isn’t available—less vibrant, but still adds warmth and zing.
Equipment & Tools
- Large mixing bowl: To combine and knead dough.
- Rolling pin: To flatten the dough evenly.
- Sharp knife or dough cutter: To slice the noodles into strips.
- Large pot: To boil water and cook the noodles.
- Damp cloth: To cover dough and keep it from drying out.
Step-by-step guide to vegan udon
- Equipment & Tools: Gather a large mixing bowl (to combine ingredients), rolling pin (to flatten dough), sharp knife or dough cutter (to slice noodles), and a pot (to boil water).
- Mix 2 cups udon flour with ½ teaspoon salt in the bowl. Slowly add ⅓ cup cold water while stirring until dough begins to come together.
- Knead the dough in the bowl or on a floured surface for about 8-10 minutes until smooth and elastic. Cover with a damp cloth and let rest for 30 minutes.
- Divide dough into 2 equal portions. Lightly flour your work surface and rolling pin. Roll each piece out to about ½ cm thickness, aiming for a rectangular shape.
- Fold the dough sheet into thirds, then slice into ¼ inch wide strips using a sharp knife or dough cutter. Toss noodles in a little cornstarch or rice flour to prevent sticking.
- Bring a large pot of water to a rolling boil (around 100°C/212°F). Drop noodles in and cook for 3-4 minutes, until they float and are tender but chewy.
- While noodles cook, prepare your broth or sauce. Optionally, sauté garlic and ginger, or prepare a simple soy-based broth with miso and sesame oil.
- Check noodles: they should be al dente, with a slight bounce when bitten. Drain and rinse briefly under cold water to stop cooking.
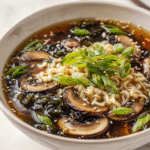
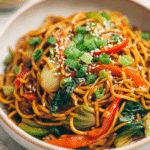
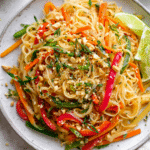
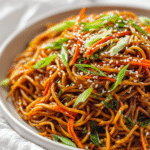
- In a bowl, combine noodles with your prepared broth or sauce, toss gently to coat. Garnish with sliced green onions, nori, or sesame seeds.
- Finish with a quick drizzle of sesame oil or a squeeze of lemon for brightness. Serve immediately, hot and fragrant.
Let the noodles rest for 5 minutes after boiling, then toss with a splash of sesame oil or soy sauce. Serve hot immediately for best texture and flavor.
How to Know It’s Done
- Noodles are chewy but not hard, with a slight bounce when bitten.
- Broth is aromatic, with a rich umami scent and balanced saltiness.
- Noodles float when cooked, indicating they are tender and ready.
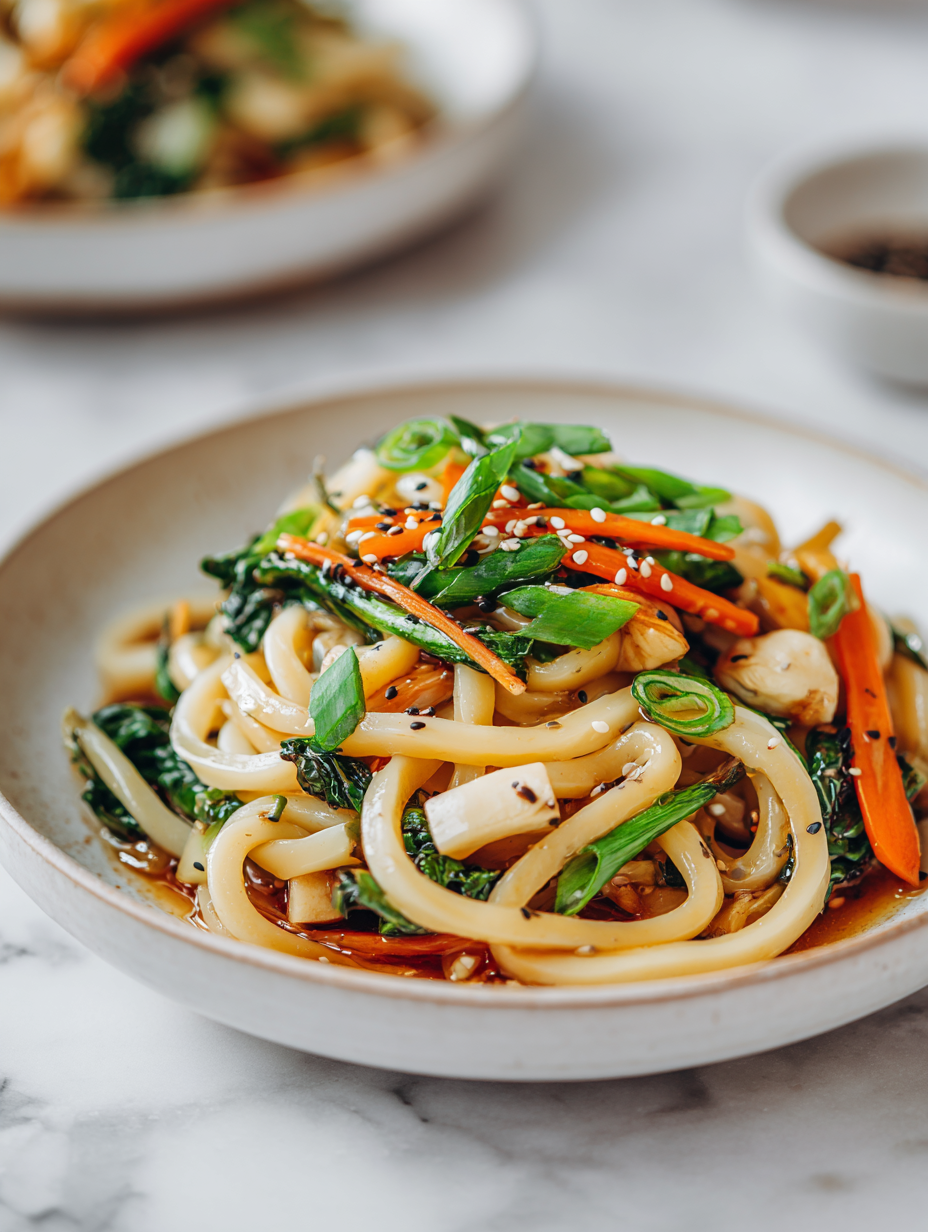
Vegan Udon Noodles from Scratch
Ingredients
Equipment
Method
- Mix the flour with salt in a large bowl, creating a well in the center.
- Slowly pour in the cold water while gently stirring with your fingers or a fork until the mixture begins to come together.
- Knead the dough in the bowl or on a floured surface for about 8-10 minutes until it feels smooth, elastic, and slightly tacky to the touch.
- Wrap the kneaded dough in a damp cloth and let it rest for 30 minutes to relax the gluten, making it easier to roll out.
- Divide the rested dough into two equal portions. Lightly flour your work surface and rolling pin.
- Roll each piece out into a rectangle about ½ cm thick, turning the dough 90 degrees every few rolls to achieve even thickness and shape.
- Fold each sheet into thirds, then slice into ¼ inch wide strips to form the noodles, tossing them lightly in rice flour or cornstarch to prevent sticking.
- Bring a large pot of water to a rolling boil. Carefully add the noodles and cook for 3-4 minutes, watching for them to float and become chewy yet tender.
- While the noodles cook, prepare your broth or sauce, such as a simple soy and sesame oil mixture, or warm up a flavorful vegetable broth.
- Once cooked, drain the noodles and rinse briefly in cold water to stop the cooking process and enhance their chewy texture.
- Transfer the noodles to a bowl, pour over your prepared broth or sauce, and toss gently to coat evenly.
- Garnish with sliced green onions and toasted nori strips for a burst of flavor and texture, then serve immediately while hot.
Tips & Tricks for Perfect Udon
- Bolded mini-head: Use a gentle touch when kneading to develop gluten without making the dough tough.
- Bolded mini-head: Lightly dust your work surface with rice flour to prevent sticking without over-drying the dough.
- Bolded mini-head: When rolling out, turn the dough 90 degrees frequently for even thickness and shape.
- Bolded mini-head: To avoid overcooking, set a timer for 3-4 minutes and watch for noodles to float and look slightly translucent.
- Bolded mini-head: Rinse cooked noodles in cold water immediately to stop the cooking process and keep them chewy.
- Bolded mini-head: Toss noodles with a small splash of sesame oil after draining to prevent sticking and add flavor.
- Bolded mini-head: If noodles are sticking together, gently separate them with your hands or a fork while still warm.
Common mistakes and how to fix them
- FORGOT to adjust water amount → Use slightly less water if dough feels sticky.
- DUMPED dough too quickly → Rest dough longer if it’s too elastic and resistant to rolling.
- OVER-TORCHED noodles → Rinse immediately in cold water to halt cooking and prevent mushiness.
- MISSED salt in broth → Add a pinch of salt or soy sauce after tasting for proper seasoning.
Quick Fixes and Pantry Swaps
- If noodles stick together, splash in more boiling water and stir gently.
- When sauce is too thick, add a splash of hot water and stir until smooth.
- Patch over-salted broth with a squeeze of lemon or a pinch of sugar.
- Shield delicate tofu from overcooking by adding it at the last minute.
- Splash cold water on overcooked noodles to halt further cooking and restore chewiness.
Prep, store, and reheat tips
- Prep the dough: Make the udon dough up to a day in advance, wrap tightly in plastic, and refrigerate. It firms up slightly, making it easier to roll out later.
- Cooked noodles: Cook the noodles until just tender, then rinse in cold water. Store in an airtight container in the fridge for up to 24 hours. The texture remains chewy and vibrant.
- Broth or sauce: Prepare the broth or sauce a day ahead to deepen flavors. Reheat gently on the stove, smelling for the umami to bloom again before serving.
- Reheating: Gently warm noodles in boiling water for 30 seconds if cold, or microwave for a quick warm-up. Toss with a splash of water or broth to refresh textures and flavors. Expect a slightly softer chew but still satisfying.
Top questions about vegan udon noodles
1. How do I know when the noodles are done?
Cook the noodles just until they float and are slightly chewy, about 3-4 minutes, for perfect texture.
2. Can I add tofu or other proteins?
Use firm tofu or skip it altogether if you prefer a more streamlined, light dish. Sautéed tofu adds a chewy bite.
3. Should I rinse the noodles after boiling?
Rinse the cooked noodles in cold water immediately after boiling to stop the cooking process and keep them chewy.
4. How salty should the broth be?
Adjust the soy sauce to taste, starting with a tablespoon and adding more if you want a saltier, richer broth.
5. How much sesame oil should I use?
Use sesame oil sparingly, just a teaspoon or two, to add a toasty aroma without overpowering the dish.
6. Can I make these noodles gluten-free?
You can substitute gluten-free flour blends for udon flour, but expect a slightly softer, less chewy noodle.
7. When should I add the toppings?
Stir-fry your sliced green onions and nori just before serving to maintain their fresh, crisp flavor.
8. Can I make the dough in advance?
Prepare the dough a day ahead, wrap tightly in plastic, and refrigerate. It firms up for easier rolling.
9. How long can I keep leftover noodles?
Store cooked noodles in an airtight container in the fridge for up to 24 hours. Reheat gently in hot water.
10. What if my noodles stick together after cooking?
If noodles stick together, add a splash of boiling water and gently separate them with a fork or your fingers.
This dish is more than just a meal; it’s a gentle reminder to slow down and enjoy the tactile rhythm of cooking. The scent of toasted sesame and the chewy bite of freshly made noodles evoke a quiet satisfaction that’s hard to find in takeout. Making vegan udon from scratch feels like reclaiming a small moment of calm in a busy day.
Whenever I return to this recipe, I’m struck by how simple ingredients can turn into something unexpectedly nourishing. It’s a little act of care—kneading, rolling, and slicing—that leaves me feeling grounded. That bowl of noodles is a quiet celebration of patience, flavor, and the joy of homemade comfort.
Hi, I’m Lily Ashworth – and if you’ve ever cried over a burnt grilled cheese or served cereal for dinner after a kitchen disaster, you’re in the right place. The phrase “say a little prayer for the burnt toast” became a family joke – something we’d mutter while scraping crumbs into the sink and laughing at yet another kitchen misadventure.