This recipe is all about capturing the imperfect beauty of a good sear. No need for perfection, just honest heat and a watchful eye. When those scallops hit the hot pan, you get a crackle and a caramelized edge that’s as satisfying as it is unpolished.
I love how each scallop develops its own quirks—the uneven browning, the crispy bits that stick a little longer. It’s about embracing those little flaws, knowing they add character and flavor. This isn’t about finesse for finesse’s sake, but about honest cooking that celebrates spontaneity.
In a busy kitchen, this method keeps things simple. No fancy ingredients, just fresh scallops and a hot pan. The magic happens quickly — a quick fry that transforms a humble shellfish into something with a little smoky, crispy charm. It’s a reminder that good food can come from spontaneous, imperfect moments.
Focusing on the imperfect, spontaneous sear — embracing the crispy bits and caramelized edges that make each scallop unique. This isn’t about perfection, but about capturing the soul of a seared shellfish in a quick, honest fry.
The beauty of imperfect searing
- Seared scallops remind me of summer evenings by the coast, where the smell of the sea lingers in every crispy bite.
- There’s a quiet pride in watching those golden edges form—a small dance of heat and patience that never gets old.
- Cooking scallops perfectly feels like a tiny victory, especially when they crackle and caramelize in that perfect sear.
- I love how each batch turns out a little different—sometimes more caramelized, sometimes just a quick, tender fry, always honest.
- Sharing these with friends feels special; it’s a simple dish that invites conversation and a sense of shared satisfaction.
The story behind this recipe
- Seared scallops have a way of transporting me back to seaside weekends, where simplicity rules and the air is filled with salt and sunshine. I remember the first time I managed to get that perfect caramelized crust—an accidental moment of patience and heat paying off. Since then, I chase that imperfect, crispy sear that makes each scallop feel alive, not polished but honest.
- This dish is my go-to when I want a quick, satisfying bite that feels special without much fuss. It’s about embracing the unpredictability—the uneven browning, the crispy edges, the smoky aroma—that makes every batch unique and memorable. Cooking these is a reminder that simplicity often delivers the most honest flavors.
- heading: ‘The allure of spontaneous searing’
Historical and cultural trivia
- Pan searing scallops became popular in French cuisine, emphasizing quick, high-heat cooking to preserve tenderness.
- Scallops have been a delicacy since ancient times, with seafood lovers valuing their sweet, briny flavor for centuries.
- The crispy sear technique is believed to have originated from home cooks aiming for a flavorful crust without overcooking the delicate interior.
- In some coastal cultures, scallops are cooked over open flames or coals, a primitive precursor to modern pan-searing methods.
- Modern searing techniques emphasize not just flavor but also texture contrast—crisp outside, tender inside—making it a culinary staple worldwide.
Ingredient breakdown
- Fresh scallops: I look for ones with a firm texture and a slightly sweet, briny smell—skip anything with a fishy odor, it won’t sear well.
- Salt: I season generously just before searing to enhance their natural sweetness—don’t salt too early or they’ll lose moisture.
- Oil: I prefer a high-smoke-point oil like grapeseed or clarified butter, which adds a nutty aroma and crackling sound—skip low-smoke oils to avoid burning.
- Seasoning: A simple sprinkle of black pepper and a touch of lemon zest right after searing keeps it bright—skip heavy spices that mask the scallop’s delicate flavor.
- Lemon: I squeeze fresh lemon juice over the scallops at the end for brightness—skip bottled lemon juice for a fresher pop.
- Butter: A pat of butter in the pan adds richness and helps with caramelization—skip if you want a dairy-free version, but it won’t be as lush.
- Herbs: Fresh parsley or chives sprinkled after plating add a herbal zing—skip if you prefer a minimalist, pure scallop flavor.
Spotlight on key ingredients
Scallops:
- Fresh scallops: I look for ones with a firm texture and a slightly sweet, briny smell—skip anything with a fishy odor, it won’t sear well.
- Salt: I season generously just before searing to enhance their natural sweetness—don’t salt too early or they’ll lose moisture.
- Oil: I prefer a high-smoke-point oil like grapeseed or clarified butter, which adds a nutty aroma and crackling sound—skip low-smoke oils to avoid burning.
Lemon and herbs:
- Lemon: I squeeze fresh lemon juice over the scallops at the end for brightness—skip bottled lemon juice for a fresher pop.
- Butter: A pat of butter in the pan adds richness and helps with caramelization—skip if you want a dairy-free version, but it won’t be as lush.
- Herbs: Fresh parsley or chives sprinkled after plating add a herbal zing—skip if you prefer a minimalist, pure scallop flavor.
Notes for ingredient swaps
- Seafood Swap: Instead of scallops, try thick-cut shrimp or calamari for a similar quick sear that’s just as satisfying—just watch cooking times since they differ in size and texture.
- Oil Choice: Use avocado oil or light olive oil for a high smoke point and subtle flavor; avoid extra virgin olive oil which smokes and burns more easily.
- Dairy-Free: Skip butter and use a splash of coconut oil or a drizzle of good-quality olive oil—these won’t give quite the same richness, but still add flavor.
- Seasoning: Fresh herbs like thyme or basil can replace parsley or chives, adding a different aromatic note—add at the end to keep it bright.
- Lemon Substitute: Lime juice or white wine vinegar can brighten the dish with a different tang—just a splash for balance, not overpowering.
- Salt: Coarse sea salt makes for a better crust, but if you only have fine salt, use a bit less to avoid over-salting—scallops are naturally delicate.
- Finishing Touch: A quick dash of smoked paprika or a pinch of chili flakes can add a smoky or spicy kick—go easy to keep the focus on the scallops’ natural flavor.
Equipment & Tools
- Heavy skillet (cast iron or stainless steel): Ensures even heat for a consistent sear.
- Tongs: For flipping scallops safely and precisely.
- Paper towels: To pat scallops dry, removing surface moisture.
- Lemon and spoon: For finishing with fresh citrus brightness.
Quick Guide to Perfect Pan Seared Scallops
- Equipment & Tools: Use a heavy-bottomed skillet, preferably cast iron or stainless steel, for even heat. Have tongs, a small spoon, and paper towels ready for quick handling and patting dry.
- Prep the scallops: Pat scallops dry with paper towels to remove excess moisture, which helps achieve a good sear. Remove any side muscle if still attached.
- Season lightly: Just before cooking, sprinkle scallops with salt and a bit of freshly ground black pepper. Avoid salting too early to prevent moisture loss.
- Heat the pan: Place your skillet over medium-high heat. Let it heat until shimmering—about 2 minutes. Add a high-smoke-point oil like grapeseed or clarified butter, swirling to coat.
- Sear the scallops: Place scallops flat side down in the hot pan. Don’t crowd—about 3-4 at a time, depending on size. They should sizzle loudly. Cook for 2-3 minutes until edges are golden brown and crispy.
- Flip and finish: Using tongs, flip the scallops carefully. Cook for another 1-2 minutes, until the other side is also caramelized. They should feel firm but still have some give when gently pressed.
- Final touch: Remove from heat. Squeeze a little fresh lemon juice over and add a small pat of butter if desired. Let rest briefly—about 1 minute—to allow juices to redistribute.
- Plate and serve: Transfer scallops to a warm plate. Garnish with chopped herbs if you like. Serve immediately for best texture and flavor.
Once cooked, let scallops rest for a minute to allow juices to settle. Plate immediately, garnish with herbs or lemon as desired, and serve while hot for best texture and flavor.
How to Know It’s Done
- Edges are golden and crispy, with a slight caramelized crust.
- Scallops are firm but not rubbery when pressed lightly.
- Internal color is opaque, with no translucent centers.
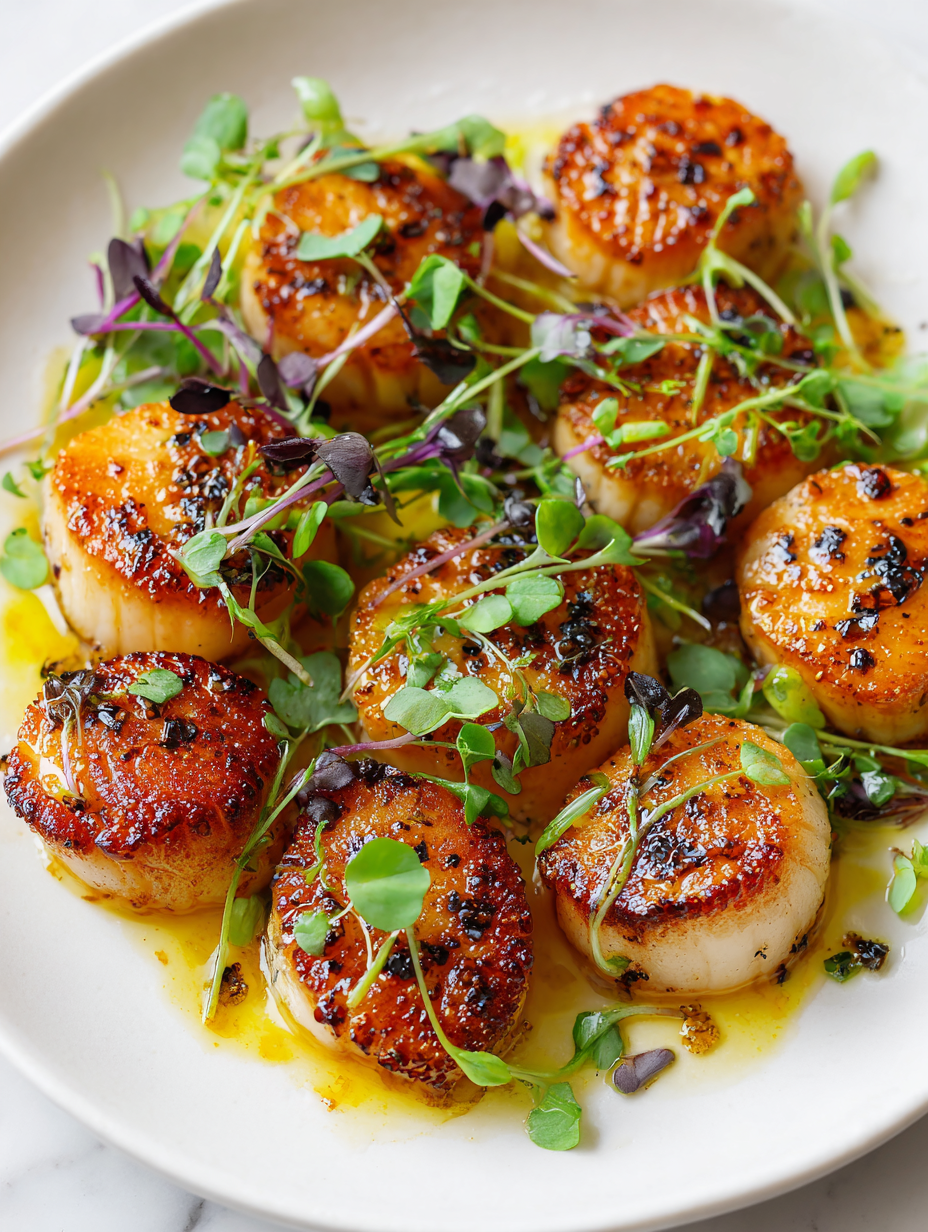
Imperfect Seared Scallops
Ingredients
Equipment
Method
- Pat the scallops dry thoroughly with paper towels to remove excess moisture, which helps achieve a good sear. Remove the side muscle if still attached.
- Heat your heavy skillet over medium-high heat until shimmering, about 2 minutes. Add the high-smoke-point oil and swirl to coat the bottom of the pan.
- Sprinkle the scallops generously with coarse sea salt just before searing—this enhances their natural sweetness and creates a flavorful crust.
- Place the scallops flat side down into the hot pan, spacing them apart so they don't crowd. You should hear a loud sizzle. Cook without moving for about 2-3 minutes, until the edges are golden and crispy.
- Using tongs, flip each scallop carefully and cook for another 1-2 minutes until the other side is also caramelized. The scallops should feel firm but still tender when pressed lightly.
- Remove the scallops from the pan and transfer them to a plate. Squeeze fresh lemon juice over the hot scallops to brighten their flavor.
- If desired, add a small pat of butter to the pan and let it melt, then spoon it over the scallops for extra richness and a touch of caramelization.
- Sprinkle chopped herbs such as parsley or chives over the scallops for a fresh herbal finish.
- Serve immediately while the scallops are still warm and crispy on the edges, enjoying the contrast of textures and smoky, caramelized flavors.
Tips for perfect seared scallops
- High heat: Use a hot pan to create an instant crackle and a golden crust without overcooking.
- Dry scallops: Pat scallops thoroughly with paper towels before searing to achieve maximum caramelization.
- Minimal movement: Let scallops sit undisturbed once in the pan to form a proper sear—resist the urge to flip early.
- Oil choice: Use a smoke-point oil like grapeseed or clarified butter for a crisp, crackling surface—avoid olive oil with low smoke point.
- Timing is key: Sear for 2-3 minutes per side until edges are golden and caramelized; overcooking makes them rubbery.
- Finish with acid: A squeeze of fresh lemon right after searing brightens the flavor and balances the richness.
- Rest briefly: Let scallops rest for a minute after cooking to allow juices to redistribute and keep them tender.
Common mistakes and how to fix them
- FORGOT preheating the pan → Always heat the pan until shimmering before adding scallops.
- DUMPED seasoning too early → Season scallops just before searing to prevent moisture loss.
- OVER-TORCHED the oil → Use a high-smoke-point oil and monitor heat to avoid burning.
- MISSED resting time → Allow scallops to rest briefly after searing to retain juices.
Quick fixes and pantry swaps
- IF scallops stick → Splash pan with a tiny bit of water, then wipe with paper towels.
- WHEN scallops turn rubbery → Ditch overcooking, remove from heat sooner, and rest briefly.
- IF oil smokes excessively → Reduce heat slightly or switch to a higher smoke-point oil.
- WHEN edges aren’t crispy → Increase heat slightly or give them a longer sear time.
- PATCH a burnt pan → Deglaze with a splash of water or vinegar, then scrub with salt or baking soda.
Prep, store, and reheat tips
- Prep scallops by thoroughly drying and removing side muscles; store in an airtight container in the fridge for up to 24 hours. They stay fresh and dry, which is key for a good sear.
- Season the scallops lightly with salt just before cooking; avoid salting too early to prevent moisture loss and loss of that crispy crust.
- Store leftover cooked scallops in an airtight container in the fridge for up to 1 day. They will be less crispy but still tasty, with a more tender texture.
- Reheat gently in a hot skillet for about 30 seconds per side until just warmed through. Watch for overcooking—scallops can turn rubbery quickly, so keep an eye on them and aim for a slight shimmer and aroma of caramelized edges.
Top questions about pan seared scallops
1. How do I pick the best scallops?
Look for scallops that are firm, dry, and smell sweet, not fishy. Avoid ones with a slimy texture or strong odor.
2. Should I dry the scallops before cooking?
Pat them dry thoroughly with paper towels to remove excess moisture. Moisture prevents proper searing and can make them soggy.
3. What oil is best for searing scallops?
Use a high-smoke-point oil like grapeseed or clarified butter. It prevents burning and crackles nicely during searing.
4. How long should I sear each side?
Cook for about 2-3 minutes per side until edges are golden brown. They should feel firm but not rubbery.
5. When should I add lemon juice?
Squeeze fresh lemon juice over the scallops immediately after cooking. It brightens the flavor and cuts through richness.
6. Can I cook all scallops at once?
Don’t overcrowd the pan; cook in batches if needed. Crowding lowers the pan temperature and prevents crispy sears.
7. Should I let scallops rest after cooking?
Allow scallops to rest for about a minute after searing. This helps juices redistribute and keeps them tender.
8. How do I know when scallops are done?
Avoid overcooking; scallops turn rubbery quickly. Watch for opaque color and a firm but tender texture.
9. What skillet should I use?
Use a heavy skillet like cast iron for even heat. Ensure it’s hot enough before adding scallops for that perfect sear.
10. What if scallops stick to the pan?
If scallops stick to the pan, splash with a little water and gently loosen before flipping. Use enough oil and preheat well.
Cooking scallops this way is a reminder that simplicity often yields the most satisfying results. There’s a quiet joy in hearing that first crackle and seeing the edges turn a perfect caramel hue.
These scallops are best enjoyed immediately, still warm and crispy. They’re a small, honest pleasure—something that feels right in a moment of quiet kitchen focus or a casual gathering.
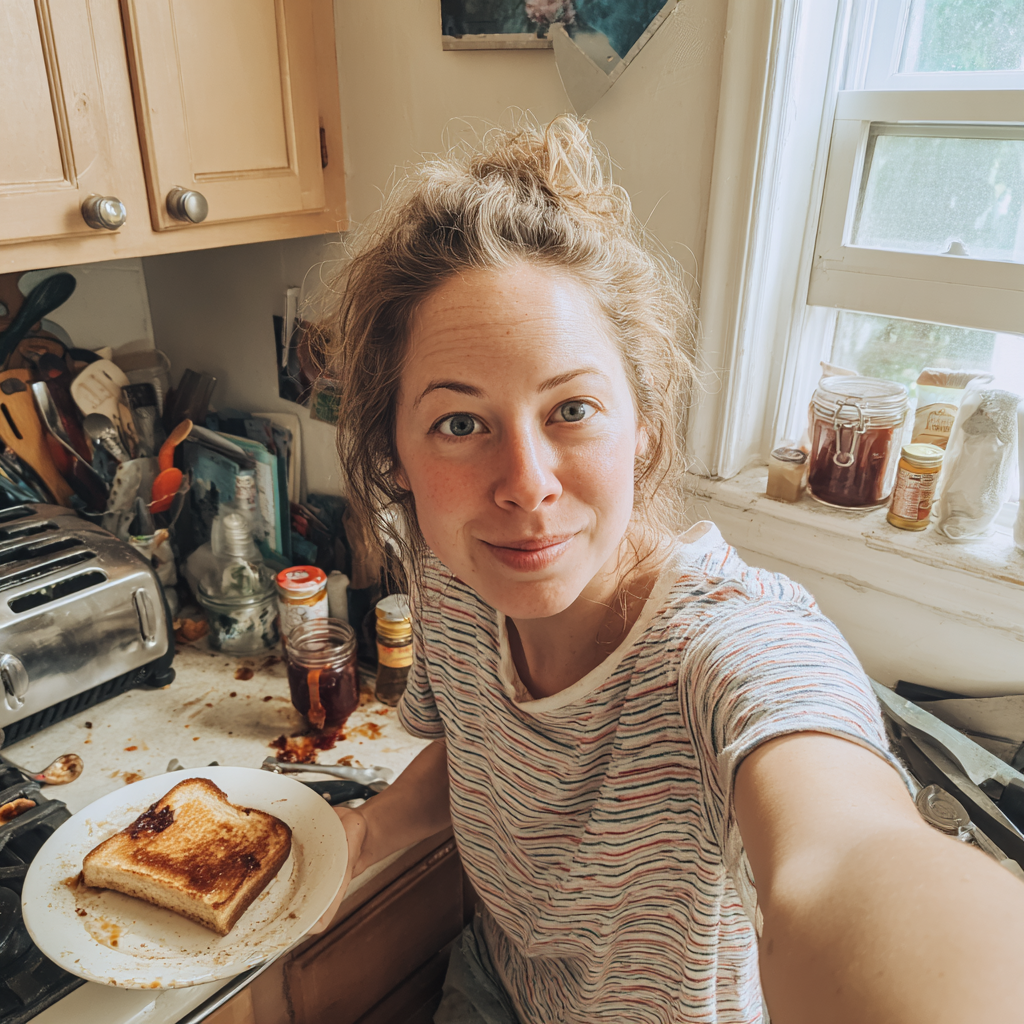
Hi, I’m Lily Ashworth – and if you’ve ever cried over a burnt grilled cheese or served cereal for dinner after a kitchen disaster, you’re in the right place. The phrase “say a little prayer for the burnt toast” became a family joke – something we’d mutter while scraping crumbs into the sink and laughing at yet another kitchen misadventure.