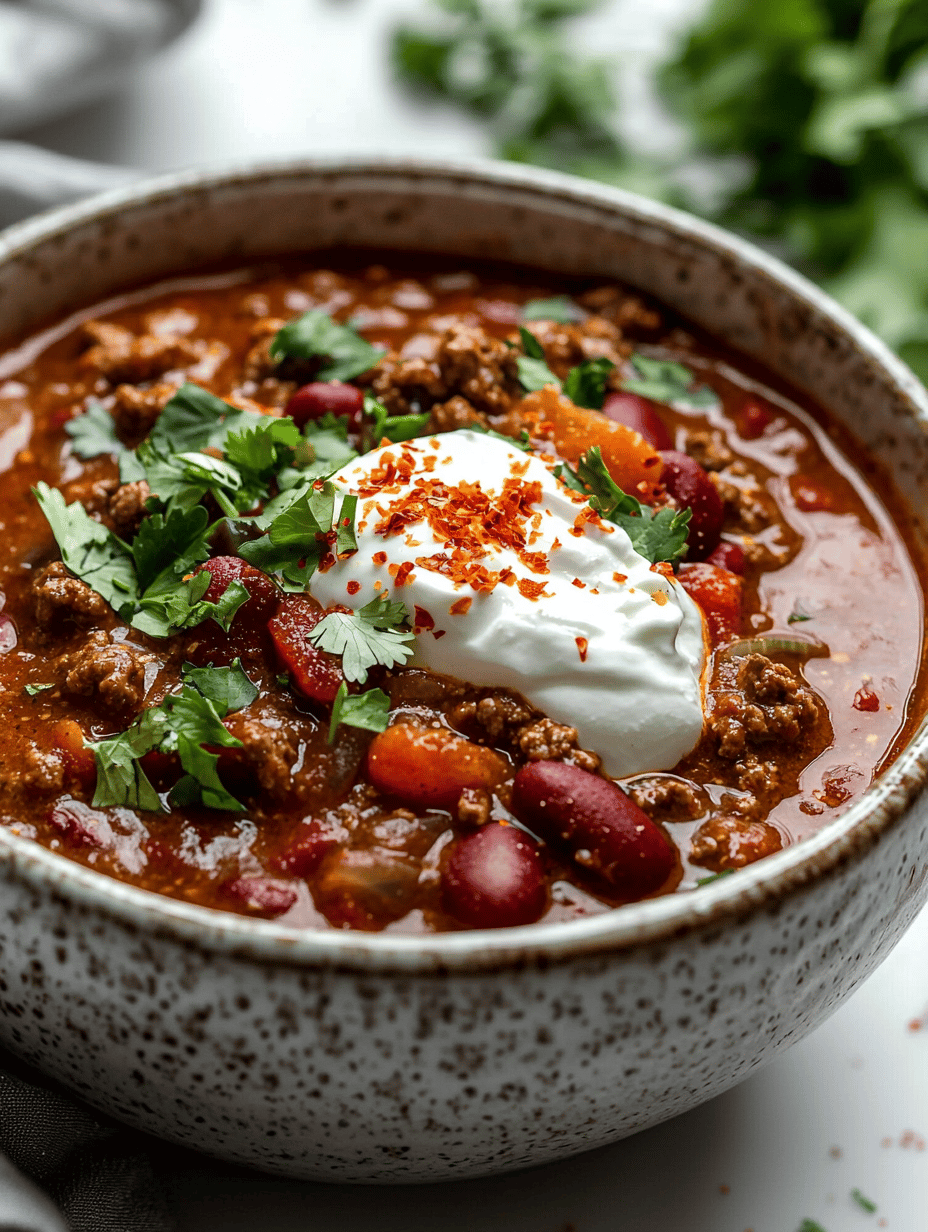
I never thought that the smell of cumin and ground beef simmering in a pressure cooker could make a tiny apartment feel like a cozy diner. Usually, I get caught up with complicated recipes, but this one reminds me that simplicity is often the best. It’s just chili, but somehow, the way the pot condensates all that flavor is magic.
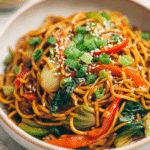
During the chaos of a busy week, this chili is what I crave—no fuss, no long waits. It’s got that rich tomato scent with a hint of smoky paprika, the kind that makes the kitchen feel warmer. For nights when you want more than just chili, try pairing it with sheet pan nachos or rustic taco soup to round out your midweek menu. Especially now, when comfort food feels less indulgent and more essential, this hits the spot in a way I didn’t expect
Why I Love This Recipe (And You Will Too)
- It’s brutally simple, but tastes like someone’s grandma spent hours on it.
- No marinade, no roasting—just throw ingredients in and forget about them.
- The way the spices meld as it cooks makes midweek dinners feel special.
- It’s perfect for those nights when sitting on the couch with a bowl feels more urgent than cooking.
- It’s a little unexpected how comforting something so fast can be.
Sometimes I think recipes like this are proof that you don’t have to overthink dinner. Just good flavors, some patience, and a little bit of pressure—literally. It’s a reminder I probably need more often than I admit.
Ingredients That Make This Chili Sing
Purpose: Each component builds depth, aroma, and texture
- 1 lb ground beef – Provides hearty, savoury richness and protein.
- 1 medium onion, diced – Adds sweetness and depth to the base.
- 2 cloves garlic, minced – Enhances aroma and gives a subtle kick.
- 1 can (14.5 oz) diced tomatoes – Forms the rich, tomato-forward base.
- 1 can (15 oz) kidney beans, drained and rinsed – Adds creaminess and body.
- 1 tablespoon tomato paste – Intensifies the tomato flavour and thickens the sauce.
- 1 teaspoon smoked paprika – Introduces a gentle smokiness.
- 1 teaspoon cumin – Warms the dish and deepens the savoury notes.
- 1/2 teaspoon chili powder (optional) – Adds mild heat for balance.
- Salt and pepper, to taste – Essential for seasoning and flavour enhancement.
- 1 cup beef or chicken broth – Helps create the perfect consistency for the chili.
Equipment:
- Instant Pot or pressure cooker
- Wooden spoon or spatula
- Measuring spoons and cups
Step-by-Step Instructions for Perfect Instant Pot Chili
Purpose: Guide readers to a hearty, flavorful chili in minimal time
- Pressure cook: Seal the Instant Pot and cook on high pressure for 10 minutes. Allow natural release for 5 minutes, then quick-release remaining pressure.
- Finish and serve: Open the lid, taste, and adjust seasoning if needed. Ladle into bowls and enjoy hot, garnished with shredded cheese or a dollop of sour cream if desired.For now, I’ll just keep it in the back of my mind—this is what comfort tastes like when you don’t have to work for it too much.
- Sauté the aromatics: Set the Instant Pot to sauté mode. Add a splash of oil, then sauté diced onions and minced garlic until translucent and fragrant, about 2–3 minutes. This builds the flavour base.
- Brown the beef: Add ground beef and cook until no pink remains, breaking it apart with a spatula. Browning adds depth and richness.
- Add the spices: Stir in smoked paprika, cumin, chili powder (if using), salt, and pepper. Cook for 30 seconds to bloom the spices and enhance aroma.
- Incorporate tomato elements: Add diced tomatoes, tomato paste, and beans. Stir well to combine everything evenly.
- Add broth: Pour in beef or chicken broth for desired consistency. Stir, scraping up any browned bits from the bottom.
Pressure Cooker Cumin Beef Chili
Ingredients
Equipment
Method
- Set the pressure cooker to sauté mode and add the oil. Once shimmering, add the chopped onion and cook until fragrant and translucent, about 3 minutes, with a gentle sizzle and softening aroma.
- Add the minced garlic and cook for another 30 seconds until fragrant, stirring constantly to prevent burning.
- Stir in the ground beef, breaking it apart with a spatula, and cook until browned and no longer pink, about 5 minutes. The beef should sizzle as it cooks, and the mixture will turn a rich brown.
- Add the cumin and smoked paprika, stirring well to coat the meat and vegetables evenly. The mixture will become fragrant with warm spice aroma, and the beef may start to darken slightly.
- Pour in the diced tomatoes along with their juices and the beef broth. Scrape the bottom of the pot gently to loosen any browned bits, which adds flavor.
- Season with salt and pepper to taste, then close the lid of the pressure cooker securely. Ensure the valve is set to sealing.
- Cook on high pressure for 10 minutes, then allow a natural release for 5 minutes before releasing any remaining pressure manually.
- Open the lid carefully, and the chili should be thickened, bubbling gently with a rich aroma. Stir to combine and taste-test, adjusting salt and pepper if needed.
- Serve the chili hot, straight from the pressure cooker or ladled into bowls, with your favorite toppings if desired.
Tips & Tricks: Elevate Your Instant Pot Chili
(Purpose: Help readers get the most flavourful, hearty chili with minimal effort)
- Optional garnishes: Top with shredded cheese, sour cream, or chopped fresh herbs to add freshness and richness.
- Use fresh aromatics: Sautéing fresh onion and garlic first enhances depth and aroma. Avoid pre-minced garlic if possible for a brighter flavour.
- Don’t skip browning the beef: Browning adds richness and umami, creating a deep, savory base.
- Bloom your spices: Toast cumin, paprika, and chili powder briefly in the pot before adding liquids — this intensifies flavour.
- Adjust chili thickness: If you like a thicker chili, reduce broth slightly; for soupier chili, add an extra 1/2 cup of broth.
- Beans matter: Drain and rinse canned beans to avoid excess sodium and maintain their creamy texture.
- Make-ahead convenience: Chili tastes even better the next day as flavours meld. Prepare in advance and store in the fridge for 2–3 days.
- Freeze portions: Cool completely, then freeze in individual containers. Reheat gently for an easy, comforting meal anytime.
Serving Suggestions: Make Your Chili an Experience
(Purpose: Inspire readers to enjoy the chili in versatile, comforting ways)
- Classic bowl with toppings: Serve hot in a bowl, topped with shredded cheddar, a dollop of sour cream, and a sprinkle of chopped fresh cilantro for colour and freshness.
- Chili over rice: Pour the chili over steamed basmati or jasmine rice for a hearty, complete meal.
- Loaded baked potato: Scoop chili over a baked potato, add a little cheese and a drizzle of sour cream for a fun, comforting twist.
- Chili nachos: Spread tortilla chips on a plate and top with chili, shredded cheese, jalapeños, and a few dollops of sour cream. Bake or broil briefly for a crispy, melty snack.
- Chili-stuffed bell peppers: Hollow out bell peppers and fill with chili, top with cheese, and bake for 15–20 minutes for a colourful, protein-packed dinner.
- Accompany with bread: Serve alongside crusty bread, garlic bread, or cornbread to soak up every bit of the rich, spicy sauce.
These serving ideas make midweek dinners feel special, whether you’re having a quick solo meal or feeding friends and family.

Hi, I’m Lily Ashworth – and if you’ve ever cried over a burnt grilled cheese or served cereal for dinner after a kitchen disaster, you’re in the right place. The phrase “say a little prayer for the burnt toast” became a family joke – something we’d mutter while scraping crumbs into the sink and laughing at yet another kitchen misadventure.