Crispy skin salmon is all about the surface—getting that crackly, golden exterior without losing the tender, flaky inside. I’ve learned that the secret isn’t just in the heat or the oil, but in how thoroughly you dry the fish before it hits the pan. Skimp on that step, and no amount of fancy technique will save a soggy, dull piece.
This recipe is a reminder that small details make the biggest difference. Patience, a good non-stick or well-seasoned skillet, and a hot pan are your best friends here. When everything comes together, you get that satisfying crackle with every bite—something I crave after a long week, a little bit of texture therapy on a plate.
Focusing on how the key to perfect crispy skin salmon lies in the often-overlooked step of patting the fish dry thoroughly, emphasizing the importance of moisture control for achieving that crackly exterior without sacrificing tender flesh underneath.
The science of crackling skin
- Getting that perfect crackle took me ages—patting the fish dry really is the game changer.
- I feel a rush of pride every time I hear that satisfying sizzle and see the golden skin turn crisp.
- There’s something oddly calming about the ritual of drying and patiently waiting for the skin to crisp up.
- Honestly, it’s a little chaos—trying not to flip too early or too late—but when it works, it’s pure joy.
- I love that crispy skin as a reminder that sometimes, the simplest tricks make the biggest difference.
The story behind this recipe
- I stumbled upon this technique during a rushed weeknight dinner, when I desperately needed something crispy and satisfying without much fuss. The trick of drying the skin thoroughly came from a failed attempt—turns out, moisture is the enemy of crispness, and once I figured that out, everything changed. Now, it’s become my go-to for a fuss-free, rewardingly crunchy fish.
- What keeps me coming back to this recipe isn’t just the texture, but that moment when the skin crackles loudly in the pan, a sound that feels like an instant win. It’s a simple reminder that paying attention to small, overlooked details can turn a humble piece of fish into something special. Plus, I love how versatile it is—paired with greens, a quick sauce, or even just lemon and salt.
- The whole process feels like a little ritual—dry the fish, heat the pan just right, then wait patiently for that perfect crackle. It’s honest, unpolished, and honest-to-goodness satisfying. That crackly skin, for me, is the unexpected reward after all the little steps—and I get a kick every time I hear it.
Crispy Skin Salmon Trivia
- Crispy skin salmon gained popularity in Japanese cuisine, where texture balance is highly prized.
- The technique of drying fish before searing dates back centuries in coastal cultures to enhance crispness.
- In the 20th century, chefs began focusing on moisture control as a key step for achieving perfect sear on various proteins.
Ingredient breakdown
- Salmon fillet: I always choose wild salmon with vibrant color—those deep orange hues tell me it’s fresh and fatty for extra flavor. Swap for farmed if you need a milder taste, but expect less richness.
- Drying towels: I pat the fish thoroughly with paper towels—moisture is the enemy of crisp skin. Skip this step if your fish is already dry, but don’t skip it if you want that crackly finish.
- Oil (high smoke point): I use neutral oil like grapeseed or canola—brightens the skin without adding flavor. Olive oil can work, but it smokes faster and may burn, so be cautious.
- Salt: I season generously—salting just before searing helps draw out excess moisture. Use sea salt or kosher, but avoid overly fine salt that might over-salt the flesh.
- Lemon: I add fresh lemon juice after cooking—brightens the fish and cuts through the richness. If lemons are unavailable, a splash of lime works well too.
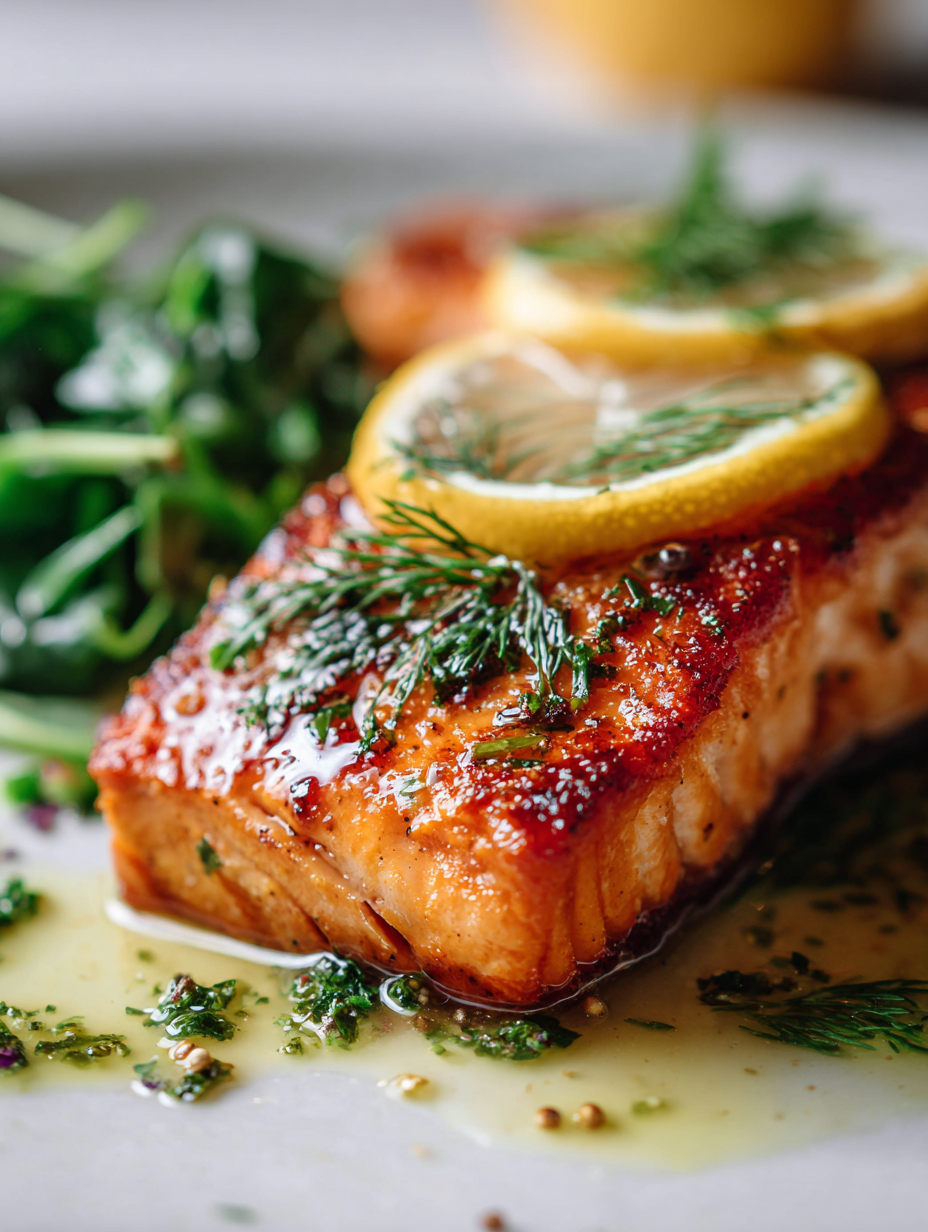
- Optional herbs: I love a quick sprinkle of dill or parsley—fresh herbs add a burst of color and aroma right before serving, but I keep them out during cooking to prevent wilting.
Spotlight on key ingredients
Salmon:
- Salmon fillet: I look for vibrant, deeply colored flesh—that’s a sign of freshness and healthy fat. Swap for farmed if you want a milder, less fatty bite.
- Skin: The key to crispiness—thoroughly pat dry with paper towels. Moisture is the enemy of crackling; skip this step, and you’ll get soggy skin.
Oil & Salt:
- Oil (high smoke point): I prefer neutral oils like grapeseed or canola—they heat quickly and won’t impart unwanted flavors. Olive oil can work but watch the smoke point.
- Salt: I use coarse sea salt or kosher—generous salting helps draw moisture and enhances flavor. Fine salt can be too concentrated if overused.
Notes for ingredient swaps
- Salmon: Wild salmon offers a richer, more vibrant flavor with a firmer texture. Swap for farmed for a milder, more uniform taste, but expect slightly less fat and richness.
- Oil: Grape seed or canola oil has a high smoke point and neutral flavor—perfect for crisping skin. You can use avocado oil for extra flavor or light sesame oil for an aromatic twist, but reduce heat slightly to prevent smoking.
- Salt: Coarse sea salt or kosher salt helps draw moisture and adds a subtle crunch. Fine table salt can be used, but use less to avoid over-salting the flesh.
- Lemon: Fresh lemon juice brightens the dish with zesty acidity. Lime or yuzu can be substituted for a different citrus note, though the flavor profile shifts slightly.
- Herbs: Dill or parsley add freshness just before serving. Fresh thyme or tarragon work well too, but avoid dried herbs during cooking—they can burn or turn bitter.
- Optional add-ins: A splash of soy sauce or fish sauce during the finishing step adds umami depth, but use sparingly to avoid overpowering the delicate fish.
Equipment & Tools
- Non-stick or well-seasoned skillet: Provides a hot, even surface for searing and prevents sticking.
- Paper towels: Thoroughly dries the fish to ensure crisp skin.
- Spatula or fish turner: Handles flipping the delicate fillet without breaking the skin.
- Tongs: Helps lift and turn the fish carefully.
- Lemon or herbs (optional): Adds brightness and freshness before serving.
Step-by-step guide to pan searing
- Gather your salmon fillet, ensuring it’s skin-on and preferably wild. Pat dry thoroughly with paper towels—no moisture, no fuss. Set aside.
- Place a clean, dry pan—preferably non-stick or well-seasoned—over medium-high heat. Let it heat for about 2 minutes until shimmering.
- While the pan heats, generously salt the skin side of the fish. This helps draw out excess moisture and adds flavor.
- Add a high smoke point oil—grapeseed or canola—just enough to coat the bottom of the pan. Wait until it shimmers and starts to slightly smoke.
- Lay the salmon skin-side down in the hot oil, pressing gently with a spatula for the first 10 seconds to prevent curling. You should hear a loud sizzle.
- Cook without moving for 4–5 minutes. The skin should turn a deep golden brown and become crispy, while the flesh begins to turn opaque about halfway up.
- Check the color—if the skin is uniformly crispy and golden, flip the salmon carefully using a fish spatula or tongs. Cook for another 2–3 minutes on the flesh side, just until it’s opaque and flakes easily.
- Remove from pan and transfer to a plate. Let rest for 2 minutes—this helps juices redistribute and keeps the skin crisp.
- Finish with a squeeze of lemon or herbs if desired. Serve immediately to enjoy that crackly skin and tender flesh.
Let the cooked salmon rest on a plate for 2 minutes. Finish with a squeeze of fresh lemon or sprinkle of herbs. Serve immediately for the best crispy skin and tender flesh.
How to Know It’s Done
- The skin is deeply golden and crispy, not pale or soggy.
- The flesh is opaque and flakes easily when gently pressed.
- The fish’s internal temperature reaches about 50°C (122°F) at the thickest part.
Crispy Skin Salmon
Ingredients
Equipment
Method
- Pat the salmon fillets thoroughly dry with paper towels, ensuring all surface moisture is removed. This step is key to getting that perfect crackly skin.
- Heat a non-stick or well-seasoned skillet over medium-high heat for about 2 minutes, until it’s shimmering and hot.
- Generously sprinkle sea salt or kosher salt on the skin side of each fillet, helping to draw out excess moisture and enhance flavor.
- Add a tablespoon of high smoke point oil to the hot pan, swirling to coat the surface evenly. Wait until the oil shimmers and just begins to smoke.
- Carefully lay the salmon fillets skin-side down in the pan, pressing gently with a spatula for 10 seconds to prevent curling. You should hear a satisfying sizzle.
- Cook the salmon undisturbed for about 4–5 minutes, watching for the skin to turn a deep golden brown and become crisp. The flesh will start to turn opaque about halfway up.
- Use tongs or a spatula to carefully flip the fillets and cook on the flesh side for another 2–3 minutes, just until the flesh is opaque and flakes easily.
- Remove the salmon from the pan and transfer to a plate. Let rest for 2 minutes to allow juices to redistribute and maintain the crispiness of the skin.
- Squeeze fresh lemon juice over the salmon and sprinkle with optional herbs for a burst of brightness and aroma. Serve immediately to enjoy the crackly skin and tender flesh.
Notes
Tips for perfect crispy skin
- Pat dry thoroughly: Moisture is the enemy of crisp skin—use paper towels to remove all surface water before searing.
- Hot pan first: Let your skillet heat for at least 2 minutes until shimmering and just starting to smoke for a perfect sear.
- Press the fish: Gently press down on the fillet immediately after placing it skin-side down to prevent curling and ensure contact.
- Don’t flip too soon: Wait until the skin is deeply golden and crackling—about 4–5 minutes—before flipping to avoid sogginess.
- Control heat: If the skin burns before crisping, reduce the heat slightly and cook more slowly to develop that crackly texture.
- Use the right oil: High smoke point oils like grapeseed or canola prevent burning and help achieve a crispy exterior.
- Rest briefly: Let the fish rest for a couple of minutes after cooking; this redistributes juices and keeps the skin crisp.
Common mistakes and how to fix them
- FORGOT to pat dry? Use paper towels to thoroughly remove moisture before searing.
- DUMPED the fish in cold oil? Ensure the pan is hot enough—oil should shimmer first.
- OVER-TORCHED the skin? Reduce heat if the skin turns dark too quickly, and flip sooner.
- SEARED too early or late? Wait for deep golden color and crackling sound before flipping.
Quick fixes and pantry swaps
- When fish sticks to the pan, splash cold water to loosen it.
- Pat the salmon dry thoroughly to prevent sogginess.
- DUMPED too much salt? Rinse lightly under cold water and pat dry again.
- Over-torched the skin? Reduce heat and cook slower to avoid bitterness.
- Splash lemon juice after cooking to brighten and refresh the flavor.
Prep, store, and reheat tips
- Pat the salmon dry thoroughly with paper towels before refrigerating—moisture is the enemy of crisp skin and should be minimized beforehand.
- Wrap the dried fillet tightly in plastic wrap or place in an airtight container. It can be refrigerated for up to 24 hours without losing quality.
- For longer storage, freeze the salmon unseasoned for up to 2 months; thaw in the fridge overnight before cooking for best texture.
- Reheat cooked salmon gently in a warm skillet over low heat or in the oven at 120°C (250°F) until just warmed through. The skin may lose some crispness but should still be tender and flavorful.
- Expect the flavor to slightly mellow after refrigeration—serve with a fresh squeeze of lemon or herbs to brighten it up again.
Top questions about crispy skin salmon
1. How important is drying the fish?
Pat the salmon dry with paper towels until no moisture remains. Moisture prevents the skin from crisping properly.
2. Should the pan be hot before adding the fish?
Use a hot pan—aim for shimmering oil—before placing the fish skin-side down. This quick heat helps start the crackle.
3. Do I need to press down on the fish?
Press the fish gently with a spatula immediately after laying it in the pan to prevent curling and promote even crispness.
4. How long should I cook the skin-side down?
Cook the salmon skin-side down for about 4–5 minutes until deeply golden and crackling before flipping to the flesh side.
5. What if the skin burns too fast?
If the skin starts to burn or darken too quickly, reduce the heat slightly and cook more slowly to develop crispness without bitterness.
6. Which oil works best for searing?
Use high smoke point oils like grapeseed or canola—they withstand high heat and help achieve an evenly crispy skin.
7. Should I rest the salmon before serving?
Let the cooked fish rest for 2 minutes after removing from the pan—this helps juices settle and keeps the skin crispy.
8. How do I know when the salmon is done?
Look for deeply golden, crackling skin and opaque, flaky flesh. The internal temperature should reach about 50°C (122°F).
9. When should I serve the salmon?
For best flavor, serve immediately after resting, with a squeeze of lemon or fresh herbs to brighten the richness.
10. What if my skin isn’t crispy enough?
If the skin isn’t crispy enough, increase heat slightly and cook a bit longer, ensuring not to burn the surface.
Crispy skin salmon isn’t just about the crunch—it’s about that moment of perfect contrast between the crackly exterior and tender, flaky inside. It’s a simple technique, but when done right, it elevates a humble piece of fish into something memorable. That sound of skin crackling in the pan is a small thrill I always look forward to.
Now, whenever I cook this, I’m reminded that paying attention to detail—like drying the fish thoroughly—can turn an everyday meal into a little celebration of texture and flavor. It’s honest cooking, unpolished and real, and I think that’s what makes it worth the effort. Sometimes, it’s the simplest tricks that bring the biggest satisfaction.

Hi, I’m Lily Ashworth – and if you’ve ever cried over a burnt grilled cheese or served cereal for dinner after a kitchen disaster, you’re in the right place. The phrase “say a little prayer for the burnt toast” became a family joke – something we’d mutter while scraping crumbs into the sink and laughing at yet another kitchen misadventure.