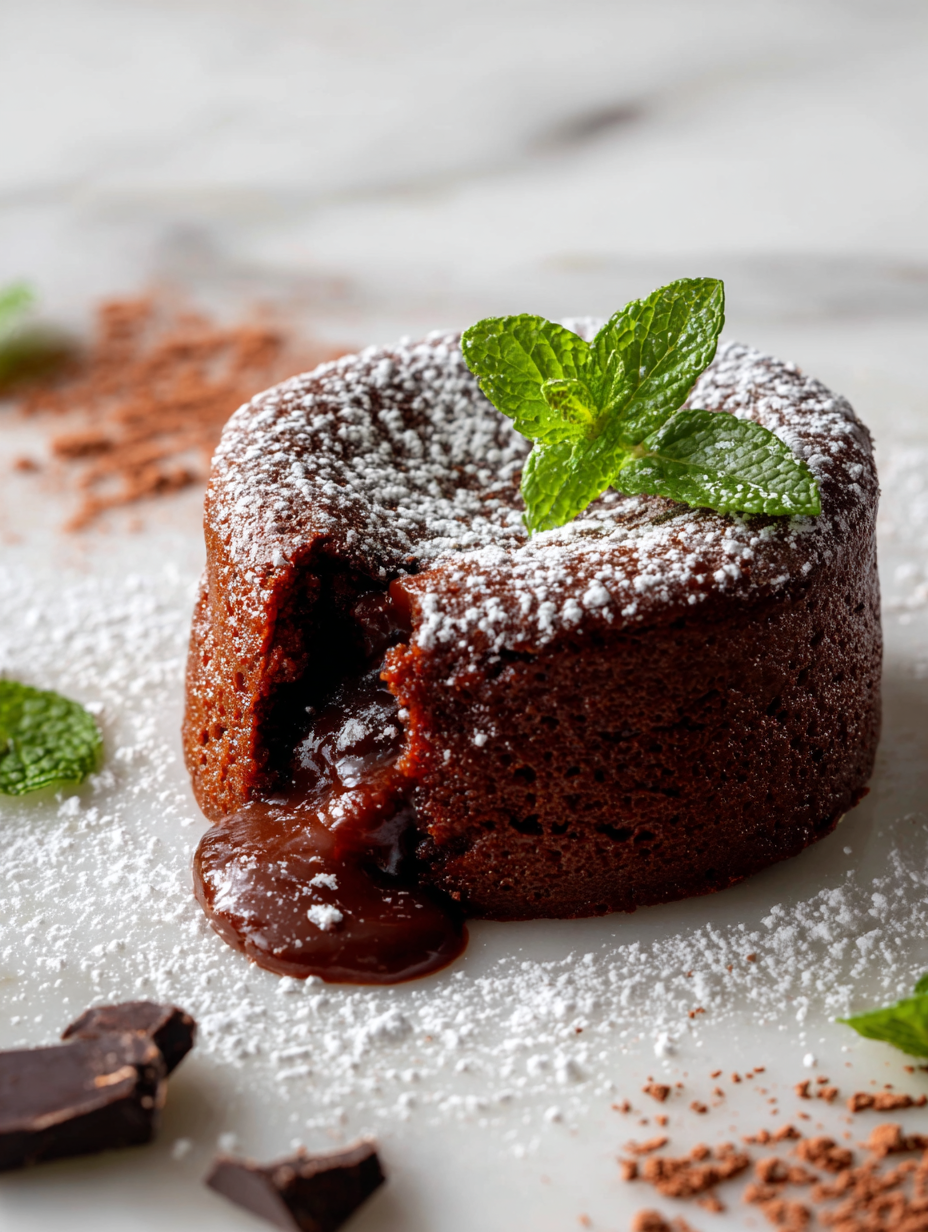
Chocolate fondant is one of those desserts that feels like a little secret between you and the spoon. There’s something about breaking into that crisp crust and revealing the molten, oozing center that makes it feel special—like a tiny, edible surprise. I love how it’s both simple to make but always impresses, especially when you get that perfect balance of firm outside and liquid inside.
What really draws me in is the contrast—the crunch giving way to silky, warm chocolate that melts on your tongue. It’s a play of textures that transforms a humble ingredient into a memorable moment. I’ve made plenty of these over the years, tweaking the timing and ingredients, always chasing that elusive, perfect gooey center that’s neither too runny nor too firm.
This recipe is more than just a dessert; it’s a little act of love and patience. The scent of melting chocolate filling the kitchen, the anticipation as they bake—these are the small joys that make baking feel like a quiet celebration. And honestly, it’s one of those desserts you’ll want to keep coming back to, each bite reminding you why the simple pleasures are often the best.
Focusing on the surprising contrast between the rich, gooey center and the slightly crisp exterior, this recipe emphasizes the textural journey of each bite, making the act of eating a playful exploration rather than just a dessert.
The textural magic of molten chocolate
- Baking this brings back lazy Sunday afternoons in my childhood home, the smell of chocolate filling every corner.
- I’ve nervously watched fondants wobble in the oven, praying they won’t turn into pudding — and often, they don’t.
- There’s a quiet pride in nailing that perfect crack on top, revealing the molten center beneath.
- Sharing these with friends feels like a small triumph, watching their eyes light up at that first gooey bite.
- Every time I make this, I remember that sometimes, the simplest desserts hold the deepest stories.
The story behind this recipe
- Making chocolate fondant started as a way to satisfy my obsession with contrast. I love the idea of a dessert that looks simple but surprises you with its texture—crisp on the outside, molten inside. It’s a bit of a gamble each time, trying to get that perfect ooze without turning it into pudding, but that’s part of the charm.
- The first time I nailed that crack on top, revealing the shiny, lava-like center, I felt a small thrill. It’s a humble dessert, but the process—waiting for it to bake just right—feels like a little secret I get to keep. Every batch is a lesson in patience, and the reward is a moment of pure indulgence, warm and gooey, with a hint of pride.
- heading
- story_type
Chocolate Fondant Trivia
- Chocolate fondant, also known as molten lava cake, was reportedly invented in the 1980s in France, aiming to combine the richness of chocolate with a contrasting texture.
- The dessert gained fame after a French pastry chef accidentally left out the flour in a chocolate cake, creating a gooey, molten center that delighted tasters.
- Its name ‘fondant’ refers to the melting, flowing center that resembles fondant icing, but it’s actually a rich, gooey chocolate core.
Ingredient breakdown: key components
- Unsweetened dark chocolate: I love the intense, slightly bitter edge it adds—use the best quality you can find, it’s the star. Swap for bittersweet if you want a touch less bitter but still rich.
- Butter: I prefer European-style for that silky melt-in-your-mouth feel. If you’re out, a neutral oil can work, but the texture won’t be quite as luscious.
- Eggs: Fresh, large eggs give structure and help the fondant hold together. For a slightly lighter feel, try a mix of whole eggs and yolks.
- Sugar: Fine caster sugar dissolves quickly, ensuring a smooth batter. Sub with superfine sugar if that’s what you’ve got, it won’t change the texture much.
- Flour: Just a touch for stability—gluten-free flour works if you need a gluten-free version, but it might slightly alter the crumb and how the fondant sets.
- Cocoa powder: Adds depth and richness—sift it well to avoid lumps. Dutch-processed cocoa will give a more mellow, chocolatey flavor, natural cocoa offers a brighter, more acidic note.
- Butter or oil for greasing: Use butter for flavor, or a neutral spray if you want a cleaner finish. It helps the fondant release cleanly from the molds or ramekins.
Spotlight on key ingredients
Dark chocolate:
- I love the deep, smoky aroma it releases when melted—use the best quality for intensity. Swap for bittersweet if you want less bitterness but still rich.
- Chocolate behaves beautifully when melted gently, forming a glossy, oozy mixture that’s essential for that molten core.
Eggs:
- They give structure and that tender crumb. When fresh, they help create a smooth, cohesive batter that holds the molten center. For a lighter touch, try a yolk and white mix.
- Eggs thicken and stabilize the batter, and their proteins set just right in baking—crucial for that perfect soft, gooey interior.
Notes for ingredient swaps
- Dairy-Free: Swap butter for coconut oil or a neutral plant-based oil. The fondant will be slightly less rich but still silky.
- Chocolate Type: Use bittersweet or semisweet chocolate if dark isn’t your thing. Milk chocolate will be sweeter and creamier—less intense.
- Eggs: Replace eggs with a flaxseed or chia seed mixture (1 tbsp seeds + 3 tbsp water per egg). It can alter the texture slightly, more crumbly.
- Sugar: Coconut sugar or maple syrup can be used for a different sweet note. Expect a subtler sweetness and slightly different moisture.
- Flour: Almond flour or gluten-free baking mix works if you need GF. The texture might be a touch denser, but it still holds well.
- Cocoa Powder: Swap Dutch-processed for natural cocoa to brighten the flavor, or vice versa for a mellow, smooth finish.
- Butter for greasing: Use a light spray or neutral oil, especially if you want a less buttery flavor and cleaner release.
Equipment & Tools
- Ramekins: To bake individual fondants evenly and for easy unmolding.
- Double boiler or microwave: For melting chocolate and butter gently without burning.
- Mixing bowls: To combine the chocolate mixture and egg batter.
- Sifter: To add cocoa powder and flour smoothly without lumps.
- Spatula: For folding ingredients gently and leveling batter.
- Baking tray: To hold ramekins during baking for even heat distribution.
- Plate or serving dish: For presentation and easy unmolding.
Step-by-step guide to chocolate fondant
- Preheat your oven to 200°C (390°F). Grease 4 ramekins generously with butter and dust with cocoa powder, tapping out the excess. This ensures easy release later.
- Melt 200g of dark chocolate and 150g of butter together. Use a double boiler or microwave in short bursts, stirring until smooth and shiny. Let it cool slightly.
- In a separate bowl, whisk 3 large eggs, 2 egg yolks, and 100g of fine caster sugar until slightly thickened and pale, about 2 minutes by hand or 30 seconds with a mixer on medium.
- Gently fold the cooled chocolate mixture into the egg and sugar blend. Mix until just combined, then sift in 30g of cocoa powder and fold again. Do not overmix.
- Sift 40g of plain flour into the batter. Fold until just incorporated—be gentle, you want to keep as much air in as possible for that fluffy interior.
- Divide the batter evenly among the prepared ramekins. Level the tops with a spatula for an even rise. Place on a baking tray.
- Bake in the preheated oven for 12–13 minutes. The edges should be set but the center still slightly jiggly when tested. The top will crack and have a shiny crust.
- Remove from oven and let sit for 1 minute. Then, carefully invert each ramekin onto a plate. Let rest for 30 seconds to allow the fondant to settle.
- Serve immediately with a dusting of cocoa powder or a scoop of vanilla ice cream. The outside will be crisp, with molten chocolate oozing out when cut.
- Enjoy the contrast of the warm, fudgy interior against the delicate crust. Each spoonful should deliver that perfect, luscious gooey center.
Let the fondants rest for 30 seconds to settle before inverting. Serve immediately for best molten effect, garnished with a dusting of cocoa or a scoop of ice cream.
How to Know It’s Done
- Edges are firm and slightly cracked, center jiggles gently when shaken.
- Crust is shiny and crackly, with a thin, delicate surface.
- When tested, the center flows out as a thick, molten mass without being runny or pudding-like.
Chocolate Fondant
Ingredients
Equipment
Method
- Preheat your oven to 200°C (390°F). Generously butter four ramekins and dust them with cocoa powder, tapping out the excess. This ensures easy release after baking.
- Place the dark chocolate and butter in a double boiler or microwave and gently melt, stirring until smooth and glossy. Let this mixture cool slightly so it’s warm but not hot.
- In a separate bowl, whisk the eggs, egg yolks, and caster sugar until the mixture becomes slightly thickened and pale, about 2 minutes by hand or 30 seconds with a mixer.
- Gently fold the cooled chocolate mixture into the egg and sugar batter, mixing until just combined and smooth.
- Sift the cocoa powder and fold it into the batter, being careful not to overmix. Then sift in the flour and gently fold until just incorporated, retaining as much air as possible.
- Divide the batter evenly among the prepared ramekins, smoothing the tops with a spatula for an even surface. Place them on a baking tray.
- Bake in the preheated oven for 12 to 13 minutes. The edges should be firm and cracked on top, while the center remains slightly jiggly.
- Remove the ramekins from the oven and let them rest for about 1 minute. Then, carefully invert each onto a serving plate, tapping gently to release.
- Serve immediately with a dusting of cocoa powder or a scoop of vanilla ice cream. The exterior should be crisp, with a warm, flowing molten center that oozes out when cut.
Notes
Pro tips for perfect fondant
- Bolded tip: Use high-quality chocolate for a richer, more intense molten center that melts beautifully on the tongue.
- Bolded tip: Slightly underbake—aim for a jiggle in the center—this ensures that luscious, oozy core every time.
- Bolded tip: Grease your ramekins well and dust with cocoa powder to guarantee a clean release without cracks.
- Bolded tip: When melting chocolate, do it gently—short bursts in the microwave or double boiler—to prevent seizing and bitterness.
- Bolded tip: Let the fondants rest for just 30 seconds after baking; this helps the molten center settle perfectly before inverting.
- Bolded tip: For a shiny crust, brush the tops with a little warm sugar syrup right after baking—adds a delicate shimmer.
- Bolded tip: Keep your baking time tight—12 to 13 minutes—to balance crisp exterior and molten interior, avoiding pudding-like textures.
Common mistakes and how to fix them
- FORGOT to check oven temperature → Use an oven thermometer for accuracy.
- DUMPED in all ingredients at once → Add ingredients gradually, folding gently for even batter.
- OVER-TORCHED the fondant → Bake for exactly 12–13 minutes; edges should be firm, center jiggly.
- UNDER-baked, fondant is runny → Extend baking by 1 minute, look for crackly, shiny crust.
Quick fixes and pantry swaps
- If fondant cracks, gently patch with warm chocolate and re-bake for 2 minutes.
- When center isn’t oozy, extend baking by 1 minute, then test again.
- Splash a little hot water on the ramekin’s base to loosen a stuck fondant.
- Patch over a dry crust with a quick brush of warm syrup or melted chocolate.
- Shield over-torched edges by covering with foil and reducing oven temperature for next batch.
Prep, storage, and reheating tips
- You can prepare the batter up to a day in advance; keep it covered in the fridge. The flavors meld and the mixture stays smooth, ready for baking with just a quick stir.
- Store baked fondants in an airtight container in the fridge for up to 2 days. Reheat gently in the oven at 150°C (300°F) for about 5 minutes until warmed through—look for the crust to crisp slightly and the center to re-melt.
- The molten center may firm up after refrigeration; to revive that oozy texture, microwave for 10-15 seconds, just enough to loosen the chocolate without overcooking. The aroma of warm chocolate should shimmer through.
- Shelf life is best within 48 hours for optimal molten appeal. After that, the fondant can become dense and the center less fluid, so enjoy it sooner rather than later for that perfect gooey bite.
- Freezing baked fondants is possible: wrap well and freeze for up to a month. To reheat, bake directly from frozen at 180°C (356°F) for 15-20 minutes, until the crust is crisp and the center molten again—smell that rich, warm chocolate filling.
Top questions about chocolate fondant
1. What exactly is chocolate fondant?
A gooey, molten center that flows when you cut into it, with a crisp exterior and rich chocolate aroma.
2. How long should I serve it after baking?
It’s best served right after baking for that perfect ooze, but can be reheated gently if needed.
3. How do I know when it’s perfectly baked?
You want the crust to be firm and crackly, with a center that jiggles slightly when shaken.
4. What type of chocolate should I use?
Use high-quality dark chocolate for a deep, intense flavor and smooth melting. Milk chocolate can be too sweet and less molten.
5. How can I prevent sticking or cracking during unmolding?
Grease your ramekins thoroughly and dust with cocoa powder to help the fondant release cleanly without cracks.
6. What’s the ideal baking time?
Bake at 200°C (390°F) for exactly 12–13 minutes. The edges will be set but the center should still jiggle.
7. What if my fondant isn’t gooey enough?
If the center isn’t molten enough, extend baking by a minute. If it’s pudding-like, reduce baking time slightly.
8. Can I make it ahead?
To store, keep baked fondants in the fridge for up to 2 days and reheat gently for best results.
9. Can I freeze and reheat fondant?
Yes, you can freeze baked fondants for up to a month. Reheat in a warm oven until the center melts again.
10. How should I melt the chocolate?
When melting chocolate, do it gently over a double boiler or in short microwave bursts to prevent seizing and bitterness.
Baking a chocolate fondant is like capturing a fleeting moment of perfection—crisp on the outside with a warm, oozing center that feels almost rebellious. Each one is a small act of patience, but the reward is a burst of rich, molten chocolate that melts into your mouth.
In the end, it’s a reminder that the simplest ingredients—chocolate, eggs, butter—can create something unexpectedly magical. It’s a dessert that feels intimate and a little bit indulgent, perfect for those quiet nights when you want something special but not complicated. Sometimes, the best desserts are the ones that make you pause and savor every bite.
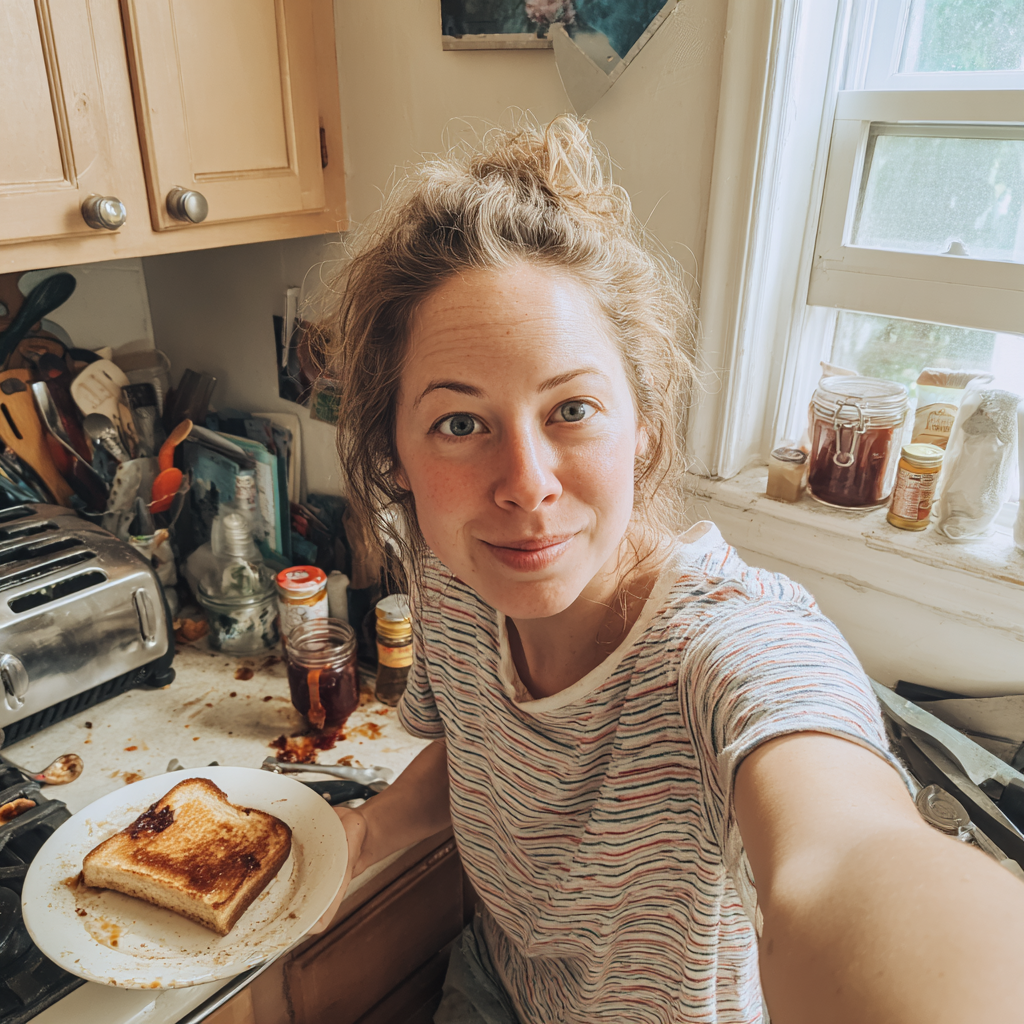
Hi, I’m Lily Ashworth – and if you’ve ever cried over a burnt grilled cheese or served cereal for dinner after a kitchen disaster, you’re in the right place. The phrase “say a little prayer for the burnt toast” became a family joke – something we’d mutter while scraping crumbs into the sink and laughing at yet another kitchen misadventure.