Charcuterie boards are often seen as simple, but they’re actually a playground for creativity. The real joy comes from mixing textures, flavors, and colors that tell a story without words. I’ve always loved how a well-curated board can make a gathering feel special, even if it’s just for one. It’s about the thrill of pairing unlikely ingredients and seeing what sticks.
Why I keep coming back to this style of charcuterie
It’s the unpredictability—no two boards are the same. The joy of balancing flavors and textures, the color bursts, the spontaneous pairing—this keeps it fresh. Plus, it’s an effortless way to gather friends or enjoy a solo moment with good cheese. Every time I make one, I find a new favorite combo, and that keeps me hooked.
Breaking down the essentials of a standout charcuterie board
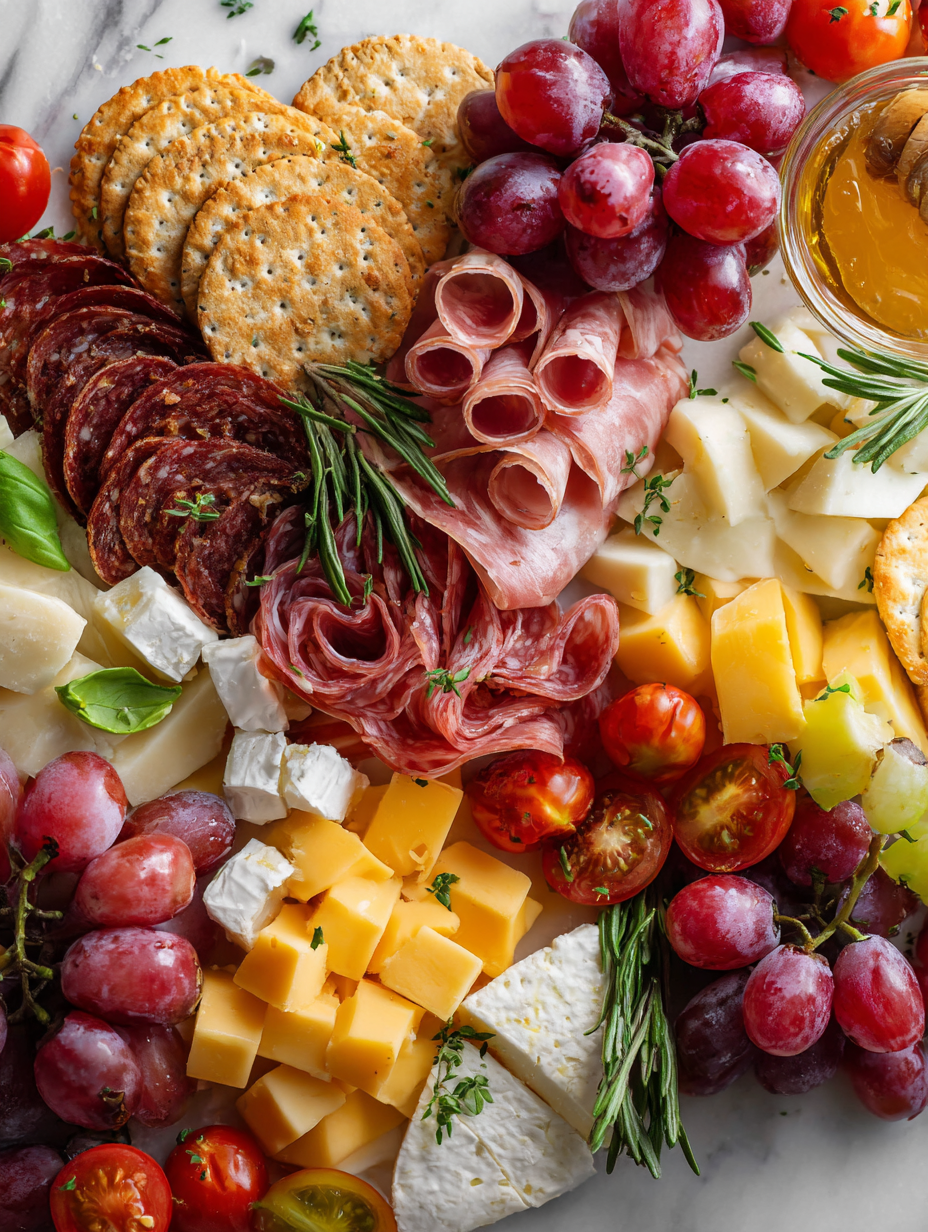
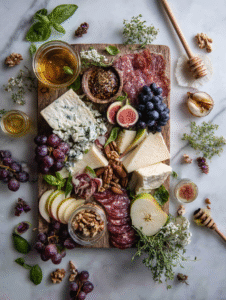
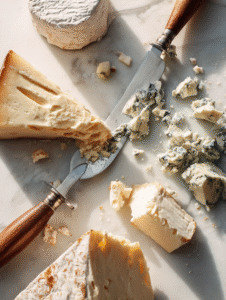
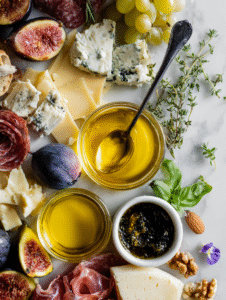
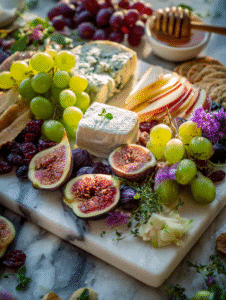
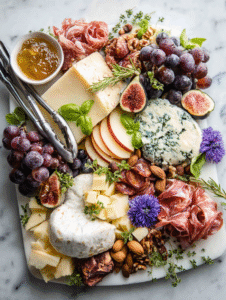
- Cheeses: Variety is key. Soft, hard, blue—each adds unique flavor and texture.
- Cured meats: Salty, smoky, sometimes spicy—fold or roll for visual interest.
- Fruits: Fresh or dried—berries, figs, apples—bring sweetness and contrast.
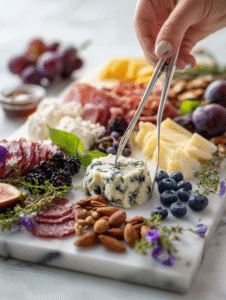
- Nuts: Toasted almonds, walnuts—crunch and richness.
- Condiments: Honey, mustard, tapenade—layers of flavor to dip or spread.
- Fresh herbs: Basil, thyme, microgreens—brighten the look and aroma.
- Edible flowers: Vivid, delicate—touches of elegance.
Tools and equipment for a perfect charcuterie display
- Large wooden board or platter: The base for your arrangement, adding rustic charm.
- Cheese knives: Cutting different cheeses without sticking.
- Small bowls or ramekins: Holding condiments and dips.
- Tongs or toothpicks: Placing small items precisely.
- Serving spoons or spreaders: For honey, tapenade, or mustards.
Step-by-step guide to assembling your standout charcuterie board
Step 1: Start with a large wooden board or platter. It’s the canvas for your edible art.
Step 2: Arrange your cheeses first, spacing them out. Think different textures: soft brie, aged cheddar, blue cheese.
Step 3: Add slices of cured meats, folding or rolling for visual interest.
Step 4: Tuck in small bowls of condiments—mustard, honey, tapenade. These bring contrast.
Step 5: Layer on fruits and nuts—figs, grapes, almonds, walnuts—to add sweetness and crunch.
Step 6: Finish with fresh herbs, edible flowers, or microgreens for a pop of color.
Cooking checkpoints and tips to make it perfect
- Ensure cheeses are at room temperature for better flavor and easier slicing.
- Arrange meats and cheeses in a way that’s visually balanced, but don’t overthink it.
- Use fresh herbs or edible flowers just before serving to keep their vibrant color.
- Keep fragile items like berries or soft cheeses on top of sturdier ingredients to prevent crushing.
Common mistakes and how to fix them
- Cheeses served cold and hard.? FORGOT to let cheeses warm up. Bring to room temp for better flavor.
- Cluttered, uninviting layout.? DUMPED too many ingredients in one spot. Space them out for visual appeal.
- Meats drying out or burning.? OVER-TORCHED meats. Keep an eye on the oven or grill, 3-4 mins max.
- Lack of freshness and color.? SKIPPED to include fresh herbs. Add right before serving for vibrant aroma.
Elegant Charcuterie Board
Ingredients
Equipment
Method
- Place your large wooden board or platter on your workspace, setting the stage for your edible art.
- Arrange the cheeses first, spacing them out across the board. Use cheese knives to cut some into slices or wedges, revealing their textures and inviting curiosity.
- Layer your cured meats next, folding or rolling slices to add visual interest and make them easy to pick up.
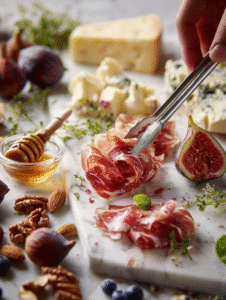
- Tuck small bowls of condiments like honey, mustard, and tapenade into empty spaces, creating pockets of flavor for dipping and spreading.
- Scatter fresh fruits like grapes, figs, or apple slices around the board, then fill in gaps with dried fruits for bursts of sweetness.
- Sprinkle toasted nuts over the board, giving crunch and richness, and arrange herbs and edible flowers on top for vibrant color and fresh aroma.

- Use tongs or toothpicks to place small items like berries or delicate herbs, ensuring everything looks balanced and inviting.
- Take a step back and review your board, making small adjustments to ensure a harmonious and colorful display that’s ready to serve.
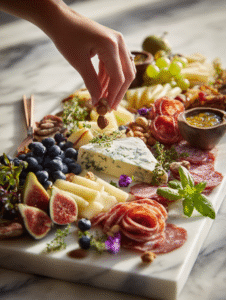
- Serve your charcuterie board at room temperature, inviting guests to explore and enjoy the variety of textures and flavors.

Hi, I’m Lily Ashworth – and if you’ve ever cried over a burnt grilled cheese or served cereal for dinner after a kitchen disaster, you’re in the right place. The phrase “say a little prayer for the burnt toast” became a family joke – something we’d mutter while scraping crumbs into the sink and laughing at yet another kitchen misadventure.