Bacon-wrapped dates are that rare snack that hits all the notes—sweet, salty, smoky, with a hint of richness. I stumbled on this combo at a brunch years ago, and it’s stuck around ever since. It’s an unassuming dish that always surprises guests, whether at casual dinners or fancy gatherings.
Why I keep reaching for this recipe
It’s quick, it’s forgiving, and it always impresses. The balance of flavors keeps me coming back, especially when I want a snack that’s both satisfying and a little unexpected. Plus, the process of wrapping and baking feels like a small ritual—an easy way to turn simple ingredients into something special.
What makes these bites tick
- Dates: Sweet, sticky, with a caramel-like flavor that’s intensified when baked.
- Bacon: Salty, smoky, and crispy—crucial for that savory crunch.
- Cheese (optional): Adds a tangy, creamy contrast—blue or goat cheese work best.
- Herbs or honey (optional): Fresh herbs add brightness; honey gives a glossy, sweet finish.
- Toothpicks: Secure the bacon, making sure everything stays in place during baking.
Tools of the trade for perfect bites
- Baking sheet with parchment paper: To keep the bacon from sticking and make cleanup easier.
- Sharp paring knife: To slice and stuff the dates neatly.
- Toothpicks: To secure the bacon around the dates.
- Oven: To crisp up the bacon evenly.
Step-by-step guide to wrapping, baking, and finishing
Step 1: Preheat your oven to 200°C (390°F).
Step 2: Slice each date lengthwise, removing the pit, but keep the fruit intact.
Step 3: Stuff each date with a small piece of cheese—blue cheese or goat cheese work beautifully—if you like a tangy surprise.
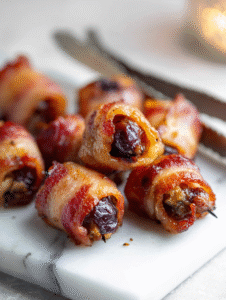
Step 4: Wrap each stuffed date with a strip of bacon, securing with a toothpick.
Step 5: Place the wrapped dates on a baking sheet lined with parchment paper.
Step 6: Bake for 20-25 minutes until the bacon is crispy and caramelized.
Step 7: Remove from oven and let rest for 5 minutes. The bacon will crisp up more as it cools.
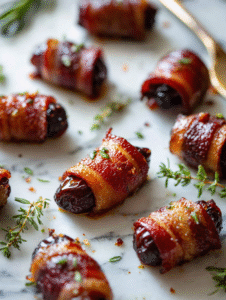
Step 8: Serve warm, garnished with chopped herbs or a drizzle of honey, if desired.
Cooking checkpoints to get it just right
- Bacon should be golden and crisp, not burnt. Watch during the last 5 minutes.
- Dates should be soft but not falling apart—test with a gentle squeeze.
- Cheese, if used, should be melted and oozing slightly when you bite in.
Common pitfalls and how to fix them
- Bacon remains chewy.? If bacon isn’t crisp enough, broil for 2 minutes at the end.
- Bacon is undercooked.? Use thinner bacon for quicker crisping or increase oven temp slightly.
- Filling is falling out.? Ensure dates are pitted and not too dry, or they won’t stuff well.
- Filling oozes out.? Overstuffed dates burst open during baking; use less filling for neat bites.

Bacon-Wrapped Dates
Ingredients
Equipment
Method
- Preheat your oven to 200°C (390°F) and line a baking sheet with parchment paper to prevent sticking.

- Using the sharp paring knife, carefully slice each date lengthwise, removing the pit while keeping the fruit intact for easy stuffing.

- If using cheese, cut a small piece and stuff it into the cavity of each date, pressing gently to fill.

- Cut the bacon slices in half crosswise to create smaller strips that are easier to wrap around each date.

- Wrap each stuffed date with a strip of bacon, securing it with a toothpick to hold everything in place.

- Place the bacon-wrapped dates on the prepared baking sheet, arranging them so they don’t touch to ensure even crisping.
- Bake in the oven for 20-25 minutes, until the bacon is golden brown and crispy, and the dates are caramelized and soft.
- Once baked, remove the tray from the oven and let the bites rest for about 5 minutes; the bacon will crisp up further as they cool slightly.
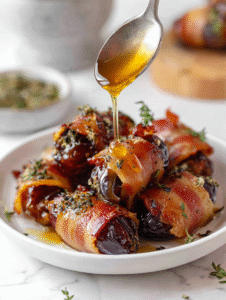
- If desired, drizzle the dates with honey for a glossy finish and sprinkle with chopped herbs for a burst of freshness.

- Serve the bacon-wrapped dates warm, enjoying the crispy bacon with the sweet, tender interior filled with gooey cheese and caramelized fruit.
Notes

Hi, I’m Lily Ashworth – and if you’ve ever cried over a burnt grilled cheese or served cereal for dinner after a kitchen disaster, you’re in the right place. The phrase “say a little prayer for the burnt toast” became a family joke – something we’d mutter while scraping crumbs into the sink and laughing at yet another kitchen misadventure.